
The useful idea first
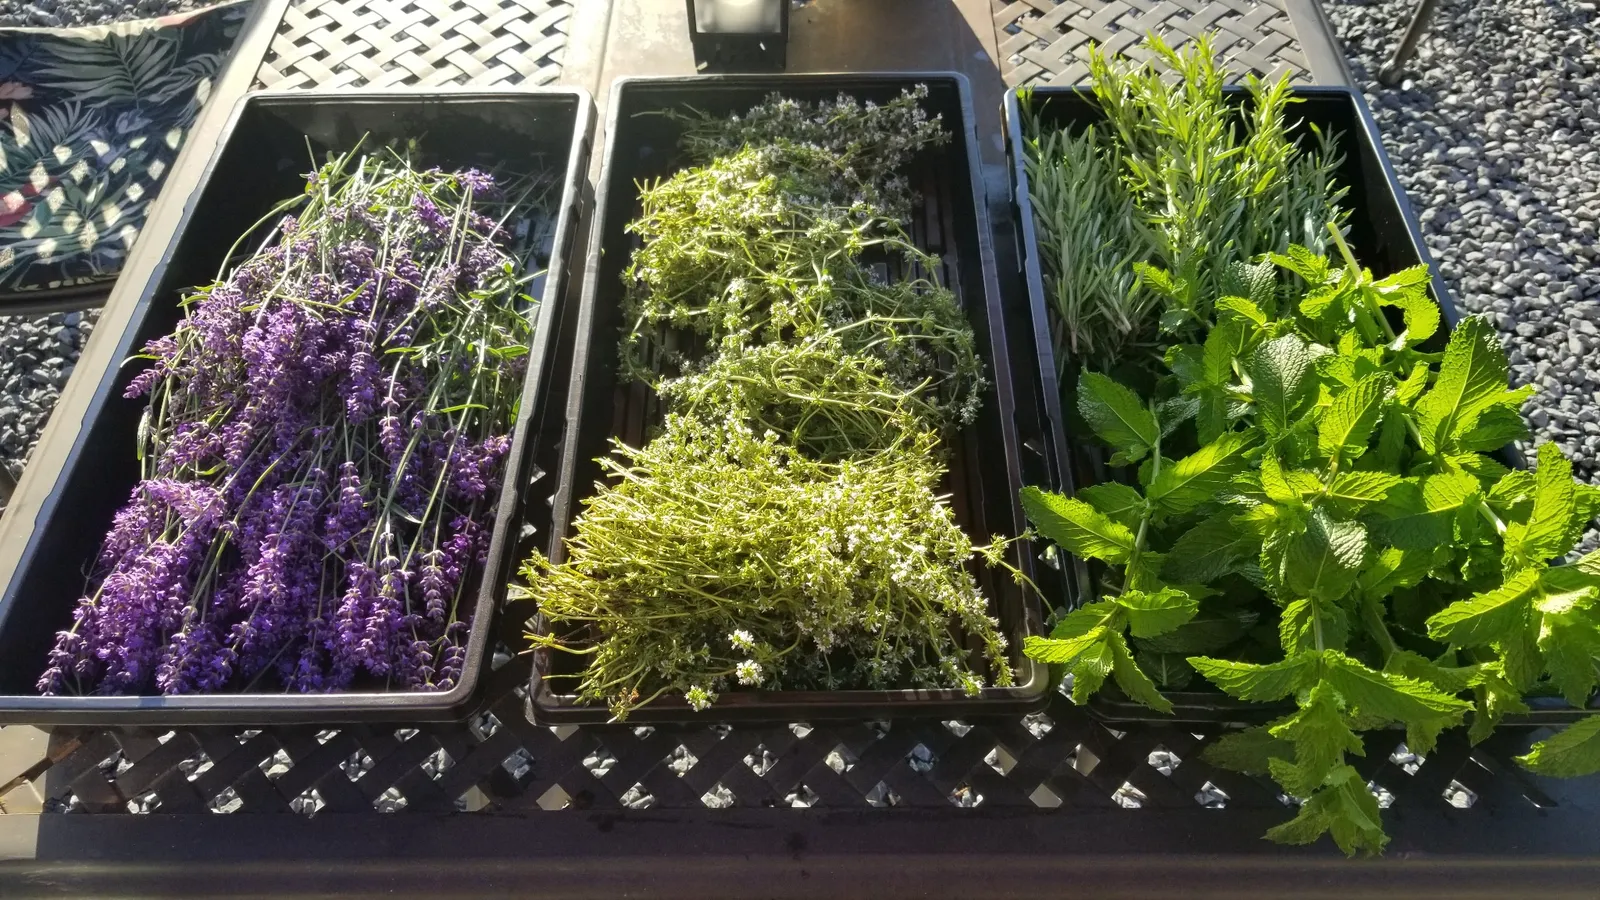
A basket of rosemary, mint, lavender and other herbs is several different harvests sharing one container. Learn to sort them by identity and intended use, choose an appropriate drying method, and store small batches with clear labels and less waste.
What you will be able to do
- Separate a mixed harvest into known plants and planned uses.
- Choose a drying method that suits the herb and local humidity.
- Recognize dry material, label it accurately and protect it during storage.
Before you begin
Try these first. Notice what you already know.
Words worth knowing
- Culinary herb
- A correctly identified plant used to season food.
- Essential oils
- Aromatic compounds in plants that contribute to smell and flavor.
- Airflow
- Movement of air that helps moisture leave harvested material.
- Condensation
- Water droplets that form when moist air cools against a surface.
- Batch
- A small group processed together with the same plant identity and method.
- Brittle
- Dry enough to break or crumble rather than bend easily.
Sort the basket before starting a method
A mixed basket may look like one harvest, but each plant needs its own decision. Rosemary has a different leaf and stem structure from tender mint. A lavender bundle meant for a dry bouquet has a different purpose from leaves meant for soup. Start by spreading the harvest in a clean work area and separating the plants. Do not tie everything into one large bunch simply because it came from the garden on the same morning.
Keep a small label with each group while you work. Write the plant name and the intended use. Separate food herbs from decorative or unknown material. If you cannot identify a cutting with confidence, do not put it into a food batch. Drying does not make an unknown plant safe to eat. You can set uncertain material aside for identification or compost it if appropriate. A clear sorting step is the foundation for every later choice about washing, drying, storage and use.
Decide what is worth preserving
Look at the amount you are likely to use before processing the whole harvest. A small jar that stays fresh and useful is a better result than several large jars that sit untouched. Think about the meals, drinks or decorative projects you actually make. You may want some herbs fresh this week, a small dried batch for the pantry and a few stems for fragrance. Those are separate goals, even when they begin with the same plant.
Inspect quality while making those choices. Remove material with decay, mold, heavy soil or serious damage. Do not try to save a poor harvest by hiding it in a mixed blend. Check whether garden sprays or other treatments allow the intended harvest and use. Follow the product label and any required interval before harvest. A familiar herb growing beside an ornamental plant can still have an unknown treatment history. When that history is uncertain, choose another source for food preservation.
Harvest in a way that supports the plant
Preserving begins before the stems reach the basket. Use plant-specific guidance for when and how much to cut. Most culinary herbs still need enough healthy growth to keep functioning after harvest. Avoid cutting every shoot from a weak or newly planted herb simply because frost is expected later. The plant's condition, its life cycle and your growing climate all affect the right choice. A modest repeat harvest can be more useful than one severe cut.
Use clean, suitable tools and a clean container. Keep stems from lying on the ground or under a pile of damp leaves. Take the harvest into shade and process it promptly rather than leaving it in a hot vehicle. Choose a time after surface dew has dried when that suits the plant and weather. The point is to bring in clean, healthy material with manageable moisture, not to follow a clock time that may be wrong for the conditions in your own garden.
Make the workspace clean and practical
Clear a table or counter before you bring the basket inside. Wash your hands and clean the tools, trays and containers you will use for food herbs. Keep pets, soil-filled pots and dirty garden gloves away from the food workspace. Prepare a place for rejected material so it does not get mixed back into a good batch. A calm work area makes it easier to see small insects, damaged leaves and plant pieces that belong somewhere else.
Lay out labels, a pen and the equipment needed for the chosen method. If you will use a dehydrator, read its manual before filling the trays. If you will hang small bundles, choose a clean, dry location with useful air movement. Do not start a large harvest session without room to spread or hang the material. A crowded counter can tempt you to leave wet herbs in a bowl for too long, which works against the drying process you are trying to begin.
Clean culinary herbs gently
Food herbs should be cleaned using trusted produce-handling guidance. Remove foreign material and poor-quality leaves. Rinse suitable herbs under cool running water, then remove excess surface moisture gently. Do not wash produce with household soap, bleach or cleaning products. The goal is clean herb material, not leaves that carry a cleaning chemical. Inspect the group again after rinsing because wet leaves may reveal dirt or small insects that were hard to see in the basket.
Handle the leaves with care. Crushing them releases aroma before you plan to use it and can damage their appearance. Drain or gently shake off excess water as appropriate for the herb. Keep each known plant group separate. The moisture added during rinsing still has to leave before storage, so move into the drying step promptly. This article focuses on common culinary herbs. Follow a suitable plant-specific source if the material has an unusual edible part or a preparation need you do not know.
Choose the method before tying a bundle
Several methods can dry herbs, but they do not all suit every plant, room or household. Air drying depends on the surrounding conditions. A dehydrator gives more control over temperature and moving air. Other appliance methods require their own careful directions. Choose based on the plant, the amount, the equipment you own and the humidity you can manage. A picture of hanging bundles shows one approach; it is not proof that hanging is the best choice for your harvest.
For a first batch, use a well-supported method you can monitor easily. Avoid testing several unfamiliar techniques at once. You want to learn what a good result feels like and how the herb behaves. Record the method and conditions rather than only the total time. A batch finished in a certain number of hours one week may take longer in different conditions. The dryness of the material matters more than a promise that all herbs will be ready on the same day.
Keep air-drying bundles small
A bundle needs air to move around and through its leaves. A large bunch may dry on the outside while staying damp in the center. Tie only a small amount together if air drying is suitable for the herb and your room. Keep separate bundles from pressing into one another. Check the tie as the stems shrink. A loose bundle can fall, while an overly tight mass can make the center harder to inspect.
Some Extension methods use a clean paper bag with ventilation holes to protect and catch leaves or seeds. Follow the method's directions and keep airflow in mind. A bag is not a way to make a damp crowded bunch safe. Choose a clean dry location away from dust, steam and strong sun. Do not hang food herbs over a stove just because the picture looks traditional. Heat, cooking moisture and splashes make that a poor place to control the process.
Pay special attention to tender leaves
Tender-leaf herbs can hold more moisture and may need faster, more controlled drying than a sturdy woody sprig. Mint, basil and similar material should not be treated as if every stem will dry well in a thick bunch. Consider separating leaves and using a suitable tray or dehydrator method. The right choice also depends on local humidity. A method that works in a dry home may perform poorly in a damp room during a humid week.
Check these batches often enough to notice trouble early. Look for damp clumps, poor airflow or signs of spoilage. Do not wait for an arbitrary finishing date if the material is developing an unusual smell or visible mold. Discard spoiled material rather than trying to rescue it for food by adding more heat. An unsuccessful small test batch can teach you to choose a different method next time. That is a useful lesson and a reason to begin with a manageable amount.
Use a dehydrator as a controlled tool
A food dehydrator can help when you want gentle heat and steady air movement. Follow the appliance manual and a trusted herb-preservation source. University of Maine and Maryland Extension guidance commonly uses a low herb range around 95 to 115 degrees Fahrenheit, with adjustments sometimes needed for high humidity. That is guidance for appropriate equipment and material, not a reason to guess at the temperature of any warm space in the house.
Spread prepared leaves in a single layer with room for air movement. Do not cover the trays with a deep pile. Check periodically and move finished material out when the method calls for it. Different herbs and leaf sizes may finish at different times, so keep batches easy to separate. If your appliance cannot hold a suitable low temperature, do not assume that its lowest setting is automatically right for herbs. Look for a method that matches the equipment you can actually control.
An example plan for a mixed harvest
| Example | Small plant groups |
|---|---|
| Use fresh soon | 2 |
| Dry as separate culinary batches | 3 |
| Keep for decorative use | 1 |
| Reject or identify first | 1 |
Watch it in practice
How to Dry Herbs — University of Maine Extension
Be cautious with oven and microwave shortcuts
An oven or microwave can be useful for some small herb batches when a tested method and the appliance instructions support it. These tools also need close attention. Very small dry leaves can heat quickly, and appliances vary. Do not improvise a temperature, place unsuitable material inside, or leave a working appliance unattended simply because another person finished a batch quickly. Follow the specific guidance for your appliance and herb, including suitable containers or supports.
If the directions are unclear, choose a simpler method rather than guessing. A dehydrator with a suitable setting or a well-managed air-drying method may be easier to learn. The goal is a good preserved herb, not the shortest possible processing time. Keep children and pets clear of hot equipment, protect your hands and let material cool as directed before storage. A shortcut is only useful when it gives you control. A method that makes you rush or overlook safety is not saving useful work.
Keep culinary and decorative lavender separate
Lavender can be grown for several purposes, and the label matters. A bundle intended for scent or dried flowers is not automatically suitable for food. Variety, treatment history and handling all affect the decision. Keep decorative stems separate from pantry herbs. If you plan culinary use, confirm the plant identity and use a reliable food source for that variety. Do not add unknown lavender flowers to a tea blend simply because you recognize the familiar smell.
For decorative bundles, appearance and fragrance may guide your timing and method, but the material should still be dry before enclosed storage. Keep dry plant material away from flames and hot lights. A sachet belongs where children and pets cannot mistake its contents for food. Label gifts clearly with the plant name and intended use. That small step helps the person receiving your harvest enjoy it without having to guess how you grew it or what you meant them to do with it.
Check dryness with more than a glance
Leaves can look dry before all moisture has left thicker parts. Trusted preservation guidance describes dried leaves that crumble and stems that break rather than bend. Check representative pieces from more than one part of the batch. A crowded tray center or bundle center may be behind the outer edges. Use clean hands and inspect the parts that were thickest or closest together. The test should reflect the material you plan to store, not just one small leaf that dried first.
Let material cool as directed after a heated method before packaging it. Warm air and remaining moisture can create condensation in a closed container. If you see moisture or other signs that the batch is not ready, address the problem promptly using trusted guidance. Do not leave a sealed damp jar on a shelf while hoping it will improve. When there is evidence of mold or spoilage, discard the affected food material. A clear safety decision is more valuable than saving a jar of uncertain herbs.
Choose a container that protects the batch
Once the herbs are properly dry and cool, use clean, dry containers with tight-fitting lids. Match the container size to the amount rather than leaving a tiny batch in a large decorative jar. Keep the packaging free from old odors that could affect the herbs. If a container was used for something that is not food-safe, do not reuse it for edible herbs. A plain suitable jar is more useful than a pretty vessel with uncertain history.
Store culinary batches separately until you are ready to make a blend. Keeping rosemary, mint and other plants in their own containers preserves choices and helps you notice differences in quality. Whole dried leaves can be crumbled closer to use rather than crushed heavily during storage. Protect the containers from heat, dampness and direct sun. A shelf above the stove may be convenient, but it exposes the herbs to exactly the conditions you are trying to avoid.
Label for the person who will use it later
A useful label includes the plant name, harvest or drying date, and intended use. Add the variety if it matters. The smell that seems obvious today may be harder to identify months later, especially if several leaves have been crumbled. Do not rely on a lid color or memory. A household member should be able to understand the jar without asking you. Clear labels also prevent decorative material from drifting into the food cupboard.
Write a short batch note in your Garden Journal. Include the drying method, approximate amount and any problem you noticed. If one batch kept good quality and another did not, these notes help you look for the cause. You may discover that small mint batches in the dehydrator work better than large hanging bundles in your humid room. That is useful knowledge about your own conditions. It is more reliable than repeating a method because it looked attractive in a photograph.
Use the oldest good batch first
Arrange storage so the older suitable batch is easy to reach. Do not pour a new harvest on top of an old one and lose the dates. Keep jars separate until you decide how to use them. Check condition before cooking. The herb should still be correctly identified and free from moisture, mold or other signs of spoilage. A fading aroma may mean quality has declined, while visible spoilage calls for a safety decision, not a stronger pinch in the recipe.
Dried herbs often have a more concentrated flavor than the fresh form. Follow the recipe and a reliable substitution guide, then adjust carefully for taste where appropriate. Different herbs vary. Start with a modest amount rather than assuming every dried leaf has identical strength. Do not treat a preservation article as advice about herbal medicine or concentrated oils. This guide is about common culinary use and clearly labeled decorative use. Those choices keep the harvest practical without making claims the batch cannot support.
Make blends only after the ingredients are sound
A mixed harvest can tempt you to make a blend immediately. Wait until every ingredient is identified, properly dried and suitable for its intended use. Then mix only a small trial amount. A blend hides individual leaves, so it makes later checking and changing the recipe harder. Keeping the rest of the harvest separate lets you adjust a cooking mix or use one herb in a different dish without committing the whole season's work.
Write down the blend ingredients and the date. Use familiar culinary recipes rather than inventing medicinal or therapeutic promises. Label gifts with all ingredients so the receiver can make their own food choices. If you use a recipe that includes fresh herbs in oil, do not assume that adding dried-looking material makes any room-temperature oil preparation safe. Herb-in-oil storage has its own safety requirements. Use a tested food-preservation method or choose a simple dry seasoning mix instead.
Plan the next harvest from what you learned
At the end of the process, compare what you harvested with what you actually preserved and used. Did you cut more mint than you had room to dry? Did decorative lavender need its own storage box? Did one herb take much more inspection than expected? These observations can improve both garden care and kitchen work. You may choose to harvest smaller amounts more often or keep one plant mainly for fresh use.
Save one clear photograph and a short note about a successful batch. Record what made the process easy: a small bundle, a labeled tray, a suitable appliance setting or a better drying room. Next season, begin with that practical record and current trusted guidance. You do not need to preserve every stem to make good use of a garden. A handful of well-handled herbs that improves everyday meals is a strong result. Careful sorting turns a mixed basket into several useful choices rather than one confusing pile.
Try it in your own space
Sort a small harvest of two known culinary herbs. Decide which will be used fresh and which small amount will be dried using a current trusted method. Keep the plants separate, record the method, and label the finished container with its name and date. Inspect representative leaves and thicker parts before storage. Compare the aroma and usefulness of the stored batch with your notes when you next cook with it.
Your next-step checklist
- Identify every plant and separate food from decorative material.
- Reject spoiled or unsuitable cuttings.
- Use clean hands, tools and containers.
- Choose a plant- and equipment-appropriate method.
- Keep batches small enough for useful airflow and inspection.
- Check dryness and allow heated material to cool as directed.
- Label containers and store them away from heat, moisture and sun.
- Keep blends simple, documented and suitable for food.
Check your understanding
Check your reasoning. You can try again.
References and further reading
Original teaching text by Perennial. These references provide deeper detail and local guidance.